
Pattern Tips
Pattern Tips, Tools and Techniques
Foundation Paper Piecing Resources and Tips
Videos
A Quilting Life with Sherri McConnell: Foundation Paper Piecing Tutorial
Sew Much Moore: Foundation Paper Piecing
Template Printing Copy the master block templates at 100% or Actual Size, single-sided. Check the 1” square on each template to ensure the printed size is correct. Trim about ¼” outside of each FPP template place.
Fabric Preparation I highly recommend that you starch and press all of your fabric before cutting. The starch will shrink your fabric a little, so be sure it’s completely dry before cutting. The starch stiffens the fabric and helps it remain flat when sewing.
A common mistake is to sew the wrong fabric in a section. If your pattern does not provide a fabric key, make one yourself by gluing and labeling pieces the fabrics on a sheet of paper. Refer to the fabric key each time you begin a block.
Another common mistake is to sew the fabric on the wrong side. Using fabrics that don’t have a wrong side (batiks and solids like Kona Cottons) are a great choice for beginners.
Recommended Tools:

12” Add-A-Quarter Plus ruler for folding the template and trimming the seams.
Mini cutting mat that fits on your sewing machine table.
28 mm rotary cutter which works well with the Add-A-Quarter ruler.
Seam roller or mini iron with pressing mat to keep near your sewing machine.
Flat head pins to help your template and fabric stay together flatter for sewing.
Paper scissors to trim templates and cut fabric set labels.
Sew FPP blocks with a stitch length of no greater than 1.5 mm to make paper removal easier. Using FPP sewing technique, work in numerical order, being sure to use the correct fabric for each part. For pieces that are adjacent to the outer edge, extend your seams into the seam allowances. Do not remove the template paper until your pattern directs you to do so.
Precutting the fabrics is a huge time saver and will speed up the sewing process. You will be less likely to accidentally sew a piece of fabric that is too small for the section (and then have to rip out all of those tiny stitches!). If you do have to rip out stitches and the paper template tears, fix it with a little piece of tape. If you choose to cut the fabric as needed, keep in mind that you may end up using more fabric.
Some inks will transfer to fabrics when heated. Take precautions to not stack your blocks when pressing. Protect your ironing board with scrap fabric.
When making multiples of the same block, use an “assembly line” method (basically chain piece). Work on one step at a time. Gather the fabric(s) needed for the same blocks. Fold all of the templates, sew each block, trim the seams, then press each block. Move on to the next step.
Dark thread colors may show under very light fabrics. Try to use a neutral color thread. You may have to change to a lighter thread for some pieces. When pairing a light fabric with a dark fabric, align the fabrics so the light is sticking a tiny bit above the dark fabric. This will prevent the dark fabric from showing through near the seam allowance.
Vintage Farmhouse Pattern Correction & Fabric Note
On page 3 of the printed booklet (page 5 of the PDF version), the heading should read:
House Backgrounds and Star Tips
If you are using directional fabrics for the ⅓-yard cuts, please compare your fabrics to the cutting diagrams before cutting. The following non-square pieces may need to be rotated: H2, H6, H7, H10, H13, H14, H15, H17, H18, and H19. Since H19 is the door, it can be especially helpful in determining whether your pieces should be rotated. There is sufficient fabric to accommodate this adjustment if made prior to cutting.
Farmhouse Pumpkins Pattern

Instead of removing the Flying Geese Template paper after making each Flying Geese block, I now recommend waiting to remove the template paper until after the Star blocks are sewn together. This will help ensure that the tips are not cut off as the Star sections are sewn together. (This has been updated on the PDF pattern but not on the printed patterns. June 11, 2025)
Chania Pattern

Additional Cutting Tips for Chania Pattern
Accent Fabric: Strip 4 of the 6” x WOF strip: First cut (4) 6” x 2” rectangles. Subcut remaining fabric into (9) 3 ½” x 6” rectangles. Subcut each of these rectangles into (3) 2” x 3 ½” rectangles for a total of (27) 2” x 3 ½” rectangles.
Cutting diagram:

Background Fabric: 6” x WOF strip: First cut (8) 6” x 3 ½” rectangles. Subcut remaining fabric into (2) 4 ½” x 6” rectangles. Subcut each of these rectangles into (2) 4 ½” x 3” rectangles for a total of (4) 4 ½” x 3” rectangles.
Cutting Diagram:

Aloha Pineapple Quilt Pattern
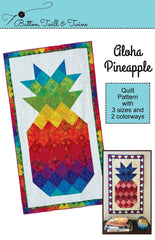
Cutting Tips: Before cutting out the blocks, I pin the fabric labels to each fabric so I have a reference. As I cut the color fabrics, I put the squares into two piles, one pile for the larger size and one pile for the smaller size. There will be 7 of the larger size squares (these will be paired with the background to make half-square triangles). After cutting, I keep the scraps with the fabric labels for easy reference.
Layout Diagrams: The letters/numbers in the layout diagram do not correspond to the colors of the fabrics. They are the order in which the blocks and rows are sewn. To lay out the pieces, I always start with the tips of the pineapple, which are Color 1 (Blue). I continue laying out the blocks for the crown and move on to the body of the pineapple, following the colors in the Layout Diagram (but ignoring the letters/numbers). For the Rainbow Colorway, Color 1 and Color 2 are repeated at the bottom of the pineapple. I then fill in with the background pieces.